How to Safely Make Frame Shoulders
- Posted
So, you’re a DIYer, Maker, Woodworker, or just someone with a few tools in your garage or basement and you want to create those smooth shoulder cuts on the frame side rails that you see with purchased frames. How do I make those cuts and try to protect my fingers? How do I make the smooth transitions and not just cut it square? Do I need to invest in one more specialized tool like a Benchtop Jointer or Router Table?
I often build multiple things at the same time. I get wood to build stands, hives, and frames all at one time and this requires me to think through and organize my cuts across projects because some need a circular saw, some a chop saw, some a table saw, and some need a normal saw blade, and some a dado blade set. I don’t like taking blades on and off over and over so I organize my cuts in a way that I can keep a certain tool or blade in play as long as possible. I also don’t want to make or use a bunch of specific jigs. I may be simple but just give me a table saw, fence, and blade and I’m happy. So, my method had to use only a few tools, one blade set, eliminate jigs (at least fancy ones), and especially be fast and repeatable. No changing setups.
Now, I have to stop and say that nothing is 100% safe when using a table saw. You should take every precaution and always stay alert. It’s your own individual responsibility to keep your fingers where they are supposed to be…on your hand. Your safety is in your own hands. I offer this approach based on my own experiences and what has worked for me. I hope it helps you and if you have some ideas to make it better or faster, please share. (Just remember you do have to flip the blank…feather boards may not help.)
- Tools: Table Saw, Dado Blade Set (3/4”-1”), Clamps (3)
- Other: Sacrificial piece of wood for the fence, stop block (I use a scrap of 2”X4”), a ¼” piece of wood (I use Lauan), painters tape.
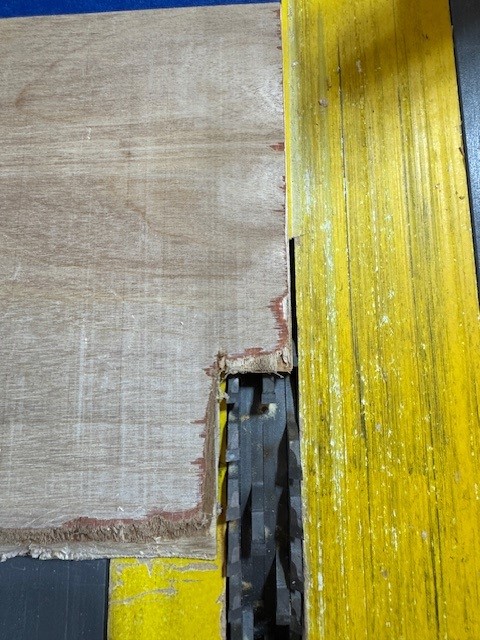
As you can see below, I used a ¼” of Lauan as the shim (“jig”) under the cut side of the blank and taped to the tabletop (1st picture below). This is a simple way to provide support to the blank after it passes over the dado blade. I just keep this on a shelf and tape it to the table saw when I need it…no fancy jig. You will note that the front edge is cut at an angle which I simply did with a knife. This keeps the wood from banging into the from edge…how simple is that. You will find if you allow just a little of the blade slot to show (3rd picture) you will more easily finish the dado cut of the blank. You’ll see what I mean when you take that last pass across the dado blade. Is it pretty? Is it fancy? No and no. It’s just simple, quick and easy to setup…oh yes, and it works over and over again.
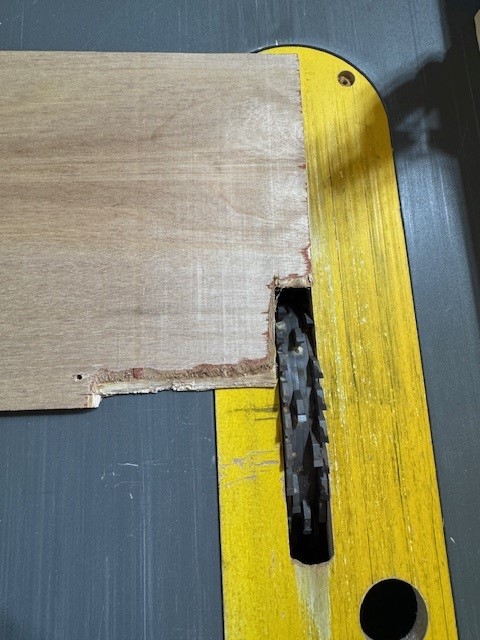
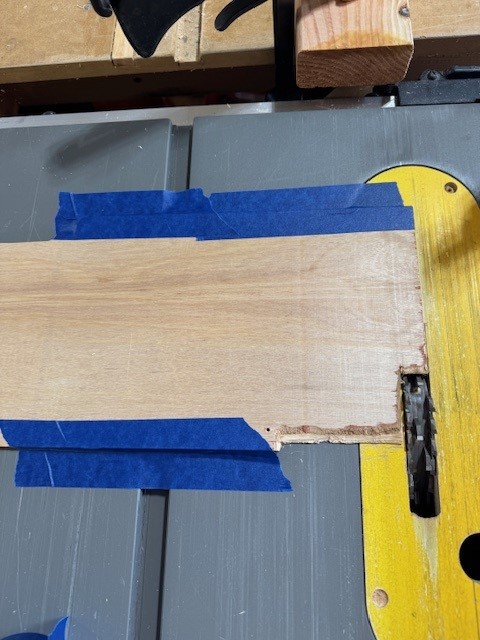
Partly because of the allowance you made above by showing a little of the blade slot there isn’t anything to keep you from pushing your nice fence right against the dado blade so you will want a sacrifice board clamped to the side of the fence…simple and quick. Now you are all set, and the only thing left to do is set your stop block so you leave 3-3/4” without a dado cut.
Set the Stop Block. Mark the end of the blank with marks 3-3/4” from one end. You will watch this mark as you make your first pass and stop just as the dado black meets this mark (3rd picture below). At this point set you stop block with a clamp (that’s the 3rd clamp). Now you can make pass after pass and always have 3-3/4” left on every blank.
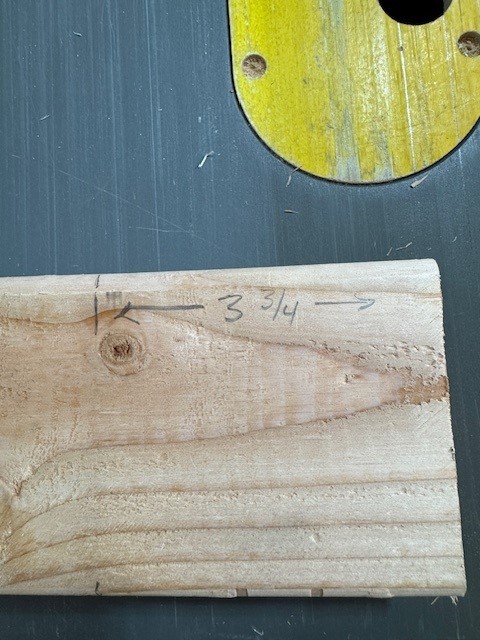
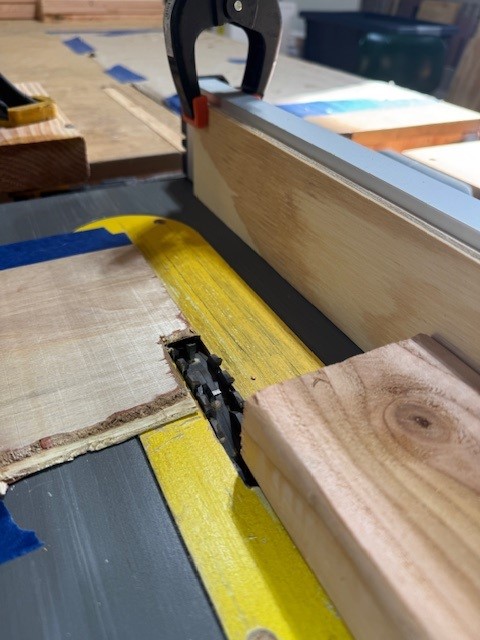
After each pass you simply move the fence a little closer to the blade the amount of width of the dado stack you put on. Once done with on side you flip it over and do the other side. It usually takes me 5 passes each side and I can complete one blank in less than 2 minutes.
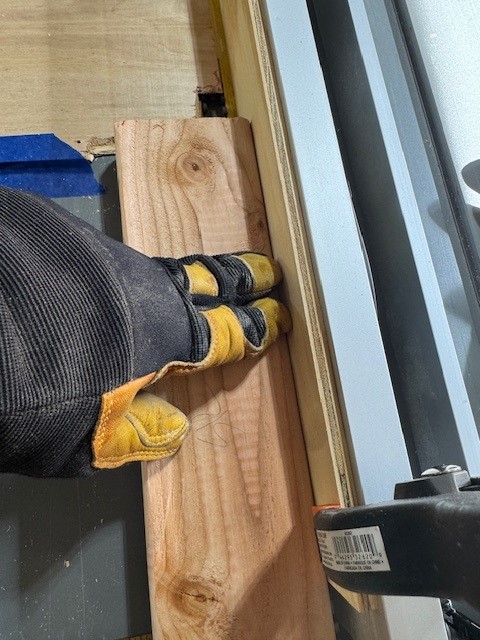
Here are a couple things to keep in mind. Because the blade is always under the blank, I am now feeling a lot safer than having a spinning blade near my fingers. You will certainly need to pay attention to the possibility of kickback as you do when cutting anything on a table saw. I would caution you not to have a lazy thumb that hangs over the side of the blank (1st picture below). The dado might grab it on the first pass since the side of the dado stack is exposed at that time.
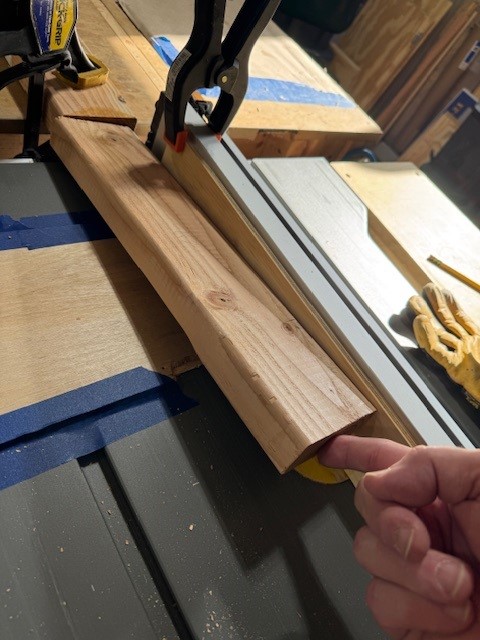
All fingers are to be on top of the board and always pushing down on the edge against the fence (the uncut portion on the underside). This will keep your blank from sagging or tipping down on the cut side possibly causing you to cut deeper on that outside edge during additional passes. Here is where you might think a feather board attached to the fence would be useful BUT that would keep you from lifting the blank up for another pass (2nd picture). I suggest practicing your method with a scrap piece of 2”X4” so you can work out the kinks of your technique.
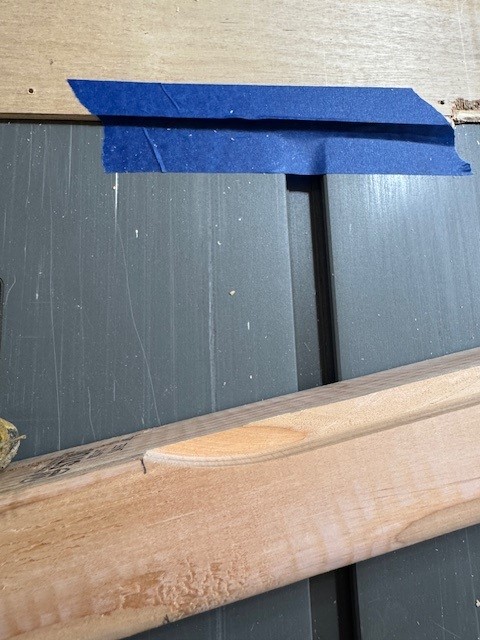
After each pass simply lift up on the backend of the blank to pick it up for the next pass (2nd picture). Sometimes you move the fence to far in and the blank jams against the Lauan. This is because there is a bit of uncut wood (3rd Picture). Simply back off the fence, run the pass again and continue. The nice thing about this method is your dado blade is doing all the work, you are not pushing hard, and if it gets caught you just rerun the pass after adjusting the fence…simple.
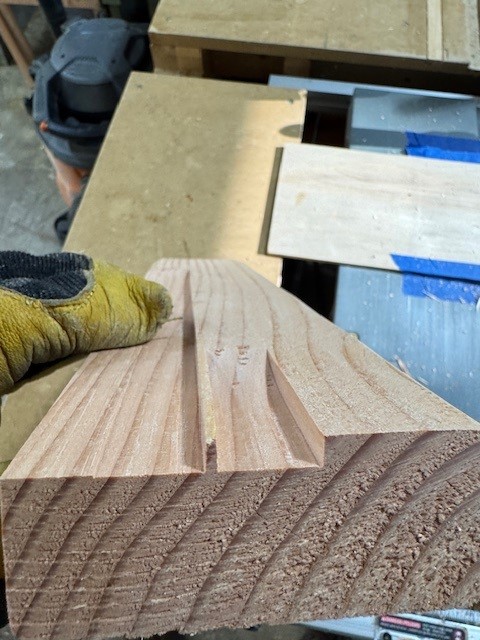
After completing both sides of the blank, you will see something like this (pictures below)…beautiful, smooth shoulders…how simple was that and fingers have been kept away from spinning blades.
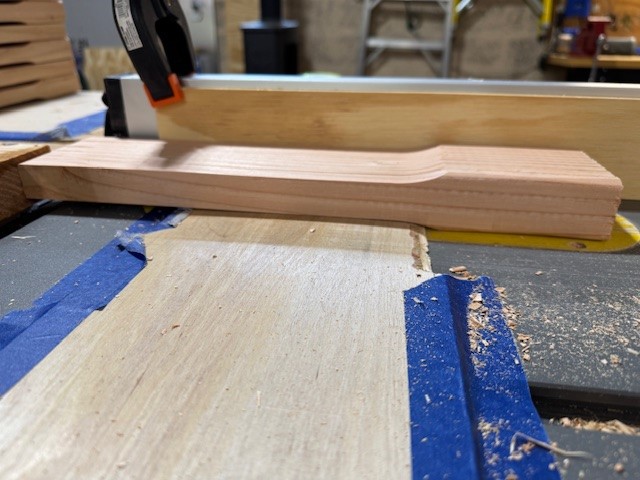
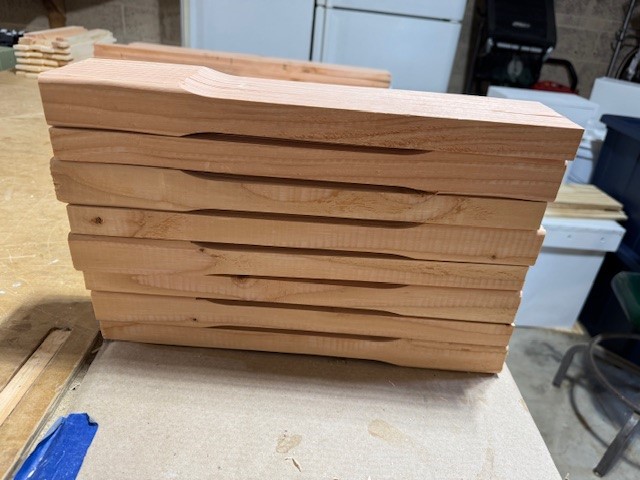
Now just pull off the tape, put your piece of Lauan and fence somewhere (you can always and easily remake these if you need to), put on a regular saw blade, set your fence to 3/8”, and using a nice push stick (again saving fingers) push your blanks through over and over creating beautiful side rails for your frames.
I hope you found this idea helpful.
Rob
WildHives.com