
Below is the process that my wife and I (Wild Hives) take to extract our honey each year. Many steps may be familiar given that uncapping and extracting honey from comb has been done for thousands of years by those keeping honey bees, but I hope you may find something new and helpful. Enjoy!
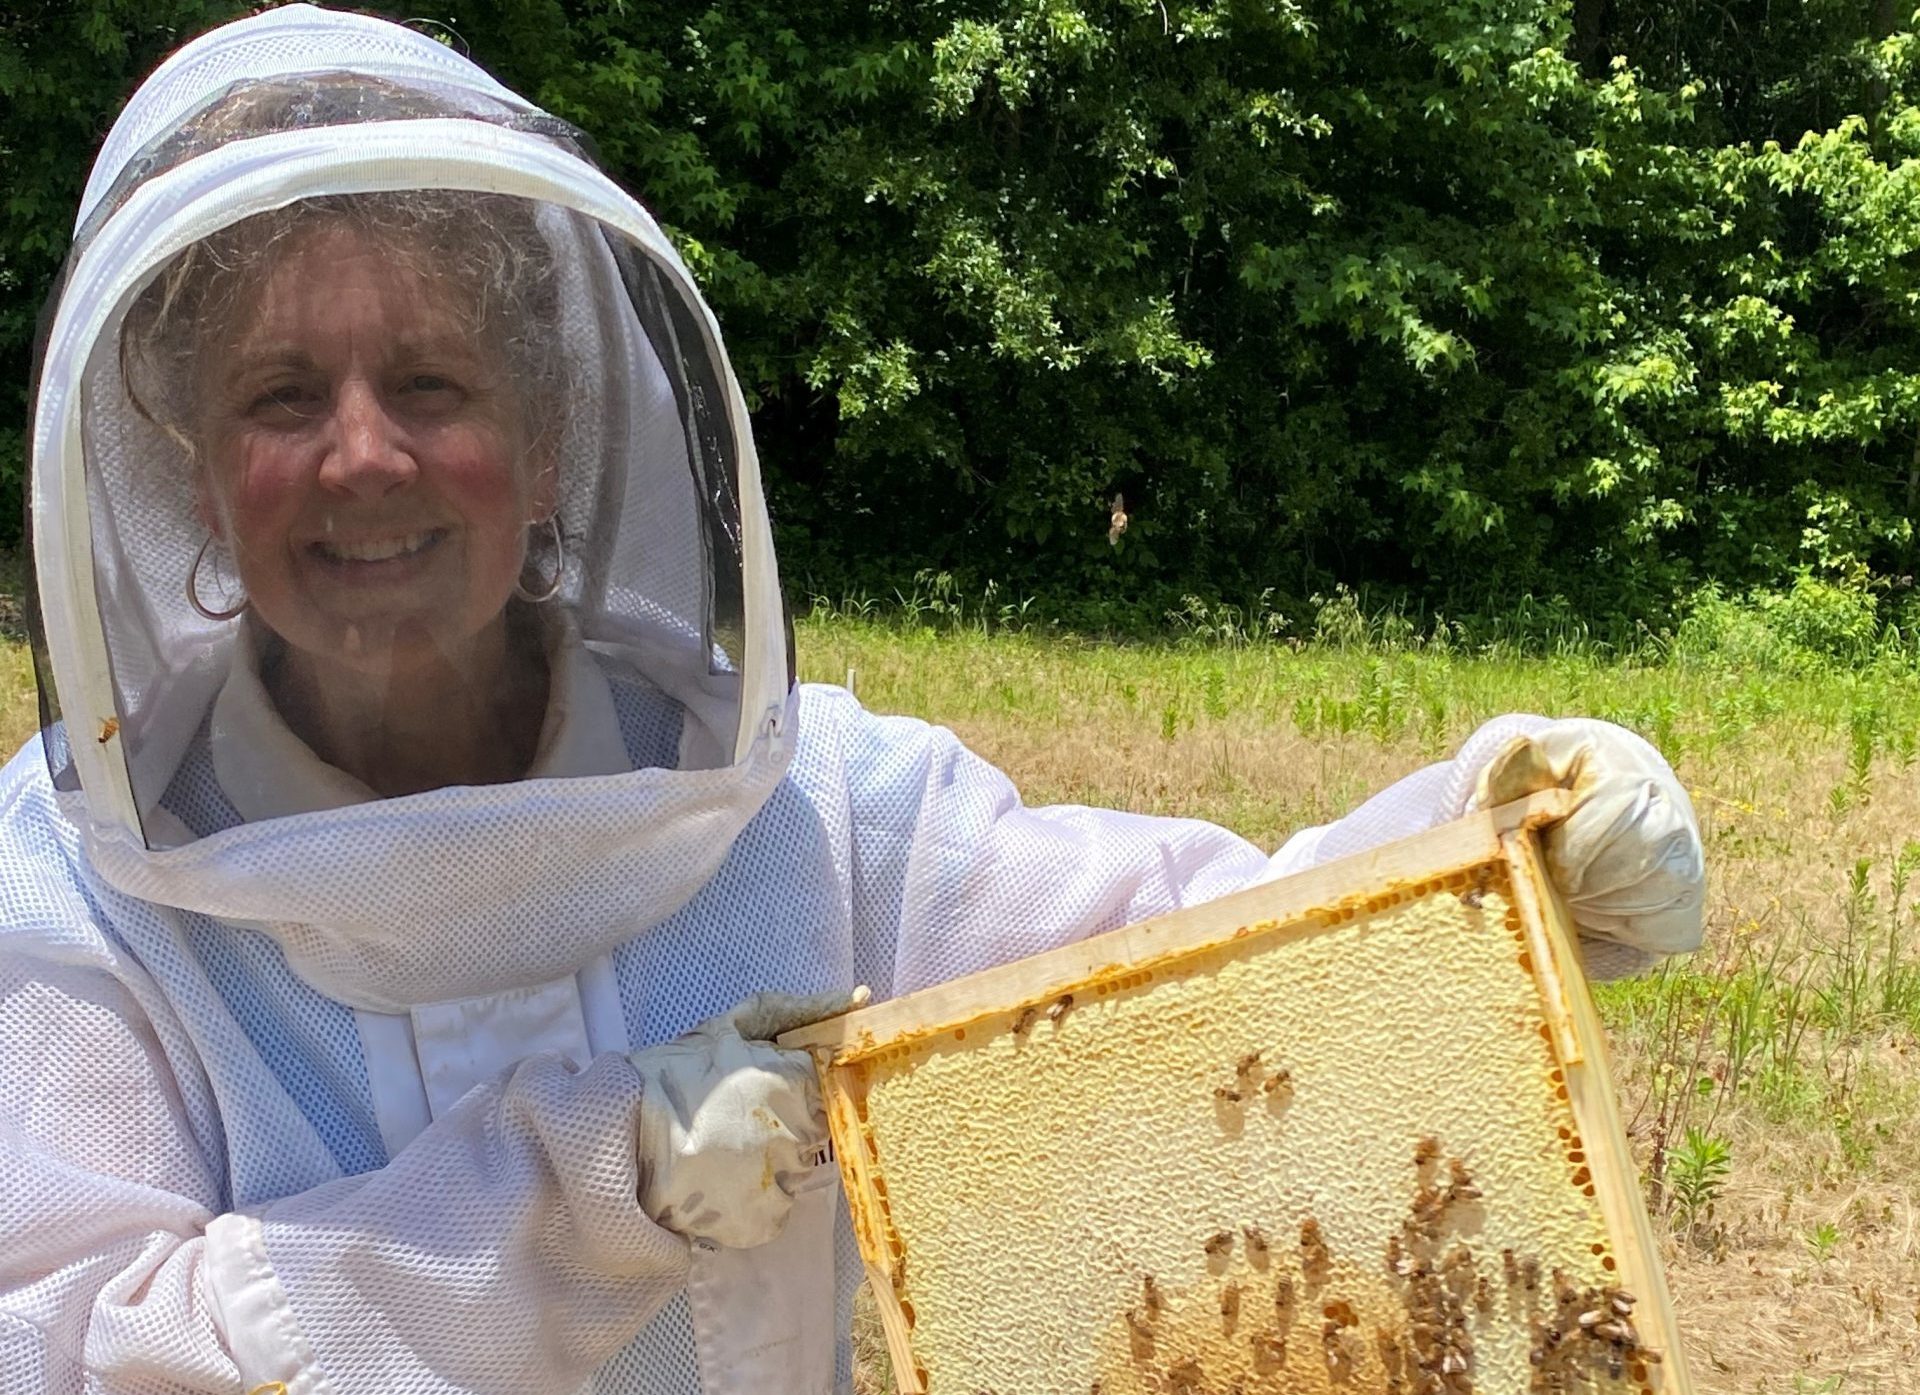
Pulling Frames
When pulling frames, it’s important to consider a few points. Generally, these are what time of the year it is; how many frames are you planning to pull; and which frames should you pull.
Given we don’t feed or treat our bees the time of the year is more relaxed than those who might need to work within a treatment schedule but that doesn’t mean pulling frames at the wrong time couldn’t be detrimental to them. Don’t get me wrong. I’m not talking about a certain day or week but more about what season it is. We generally only pull honey frames during the nectar flow which for our area is heaviest in May/June. Now we may extract at other times such as spinning out the remaining winter honey in the spring or even adding honey frames back in as we do spring splits, but the nectar flow is our real harvest time. This time of the year is also when we see the colony trying to expand their brood area which we assist by adding emptied honey frames back in on either side of the brood area while also removing capped honey frames at either end.
We would not suggest pulling frames right before or during the dearth (August here) and I would be very cautious of pulling frames in the fall unless you need to as you reduce hive space for winter prep. You must always ensure the colonies’ winter preparations are maintained as much as possible for their survival. Remember, you can always extract unused honey in the spring once you know your weather conditions have stabilized.
We are often asked which frames to pull and how many, or the reverse, how many should we leave. As mentioned above we try to rotate our frames by putting empty comb near or within the brood area while pushing older comb to the outsides (more on the value of old comb later). The older comb on the outside gets filled with nectar and pollen. We then only pull “mostly” capped frames. What do I mean “mostly”? Sometimes frames as large as Layens frames can have a couple inches at the bottom uncapped and some beekeepers may cautiously want to spin this out separately because of the concern of fermentation caused by high water content but we have found that when added to the rest it will balance out the water content as long as it’s not too much. You must always test the water content so spend a few dollars and get yourself a refractometer. If you have half or more of the frame uncapped it’s best to leave it to the experts and let them desiccate it for another week or two.
How many frames should you pull? The answer to this is based on the condition of your colony. Strong colonies pushing the limits of the hive size can have 4 or more Layens frames pulled at one time, but we often leave weaker colonies alone until the fall or even at winter prep. Why? Because we want to give them the best chance possible to build and survive. We can always pull later. Is 4 a magic number? No. We do suggest leaving at least 2 frames of honey on either side of the expanding brood area. We also don’t pull honey frames that are full of pollen. Often these have capped honey on one side and a lot of pollen on the other. They also tend to be right next to the brood area and are set up by the nurse bees to be their go to location for supplies to feed the larvae.
Freeze or Not to Freeze
Why are we even talking about freezing honey frames? Often honey frames could have pests hiding in cracks and crevices or maybe even eggs inside a cell on an outside edge. Freezing your frames for 24-48 hours will kill these pests but it will also require you to take more time. You may choose not to freeze because you want to pull and extract your honey on the same day. Maybe you don’t have a freezer to do this. Also, if frozen you will also need to restore the frames to a room temperature of between 80-90°F so the honey will flow properly during extraction, which can be done by storing them in a warm place for another day or two.
You may ask, do I need to freeze them. The answer is no but be prepared when you filter/strain out the bits of comb from the uncapping process knowing that you may find a few Small Hive Beetles crawling around on the wax capping’s. Remember they also lay eggs. As a reminder, don’t leave your frames in the freezer for more than 48 hours. This allows the freezer to start drawing out the moisture from the comb making it very brittle to work with.
Based on what equipment you have, your time table, and how you intend to filter might cause you to choose freezing or not. Will freezing hurt your honey? Generally, no. It’s even an option if you intend to store honey for a long time in a properly sealed container. While rare, some honey aficionados argue that freezing can slightly alter the delicate flavor profiles of certain honeys. Freezing will also require you to take your time thawing it so that its consistency and texture is maintained. You will also need a proper sealed container to hold the frames while thawing, so pests aren’t reintroduced.

Uncapping and Tools
Well, this topic is really the “dealers’ choice” or beekeepers’ choice in what works best for you. There are all kinds of tools out there and we won’t argue that one tool works over another if you have a favorite. The goal though is to fully uncap the honey so the extraction process can work as well as possible. We personally like using a tool that removes as little comb as possible while fully opening the capping. We also like using a tool that we can pull downward on the cell slightly opening more of the lower edge. This is because cells are built tilted slightly upward. The upward tilt allows the nectar to stay within the cell while the bees are reducing its moisture content.
Another consideration might be the number of frames you need to uncap, how fast you need to do the uncapping, and what environment you are in. If you are in your kitchen and only have a few frames even a fork out of your silverware drawer will work. If you have access to electricity there are more options such as a hot knife. One thing to consider about this tool is the amount of comb you may advertently remove or the possibility of burning the honey so you will need to be careful. They do have the benefit of resulting in a smoother comb surface for the bees to start from after extraction. Do be aware that overheating is a risk to any honey, as the extreme temperature can affect texture and taste so you may want to purchase one that has some kind of temperature control, but we understand that these can be pricey.
The tool we currently use is a simple uncapping fork. These are cheap, easy to hold, there is no need for electricity, and they are simple to draw across the frame. They work well but we have found that the comb may appear torn or rough, but our bees seem to be experts at smoothing it out later. If you find you have older frames, and the comb is getting both a little stiff and uneven something like a hot knife may be just what you need.
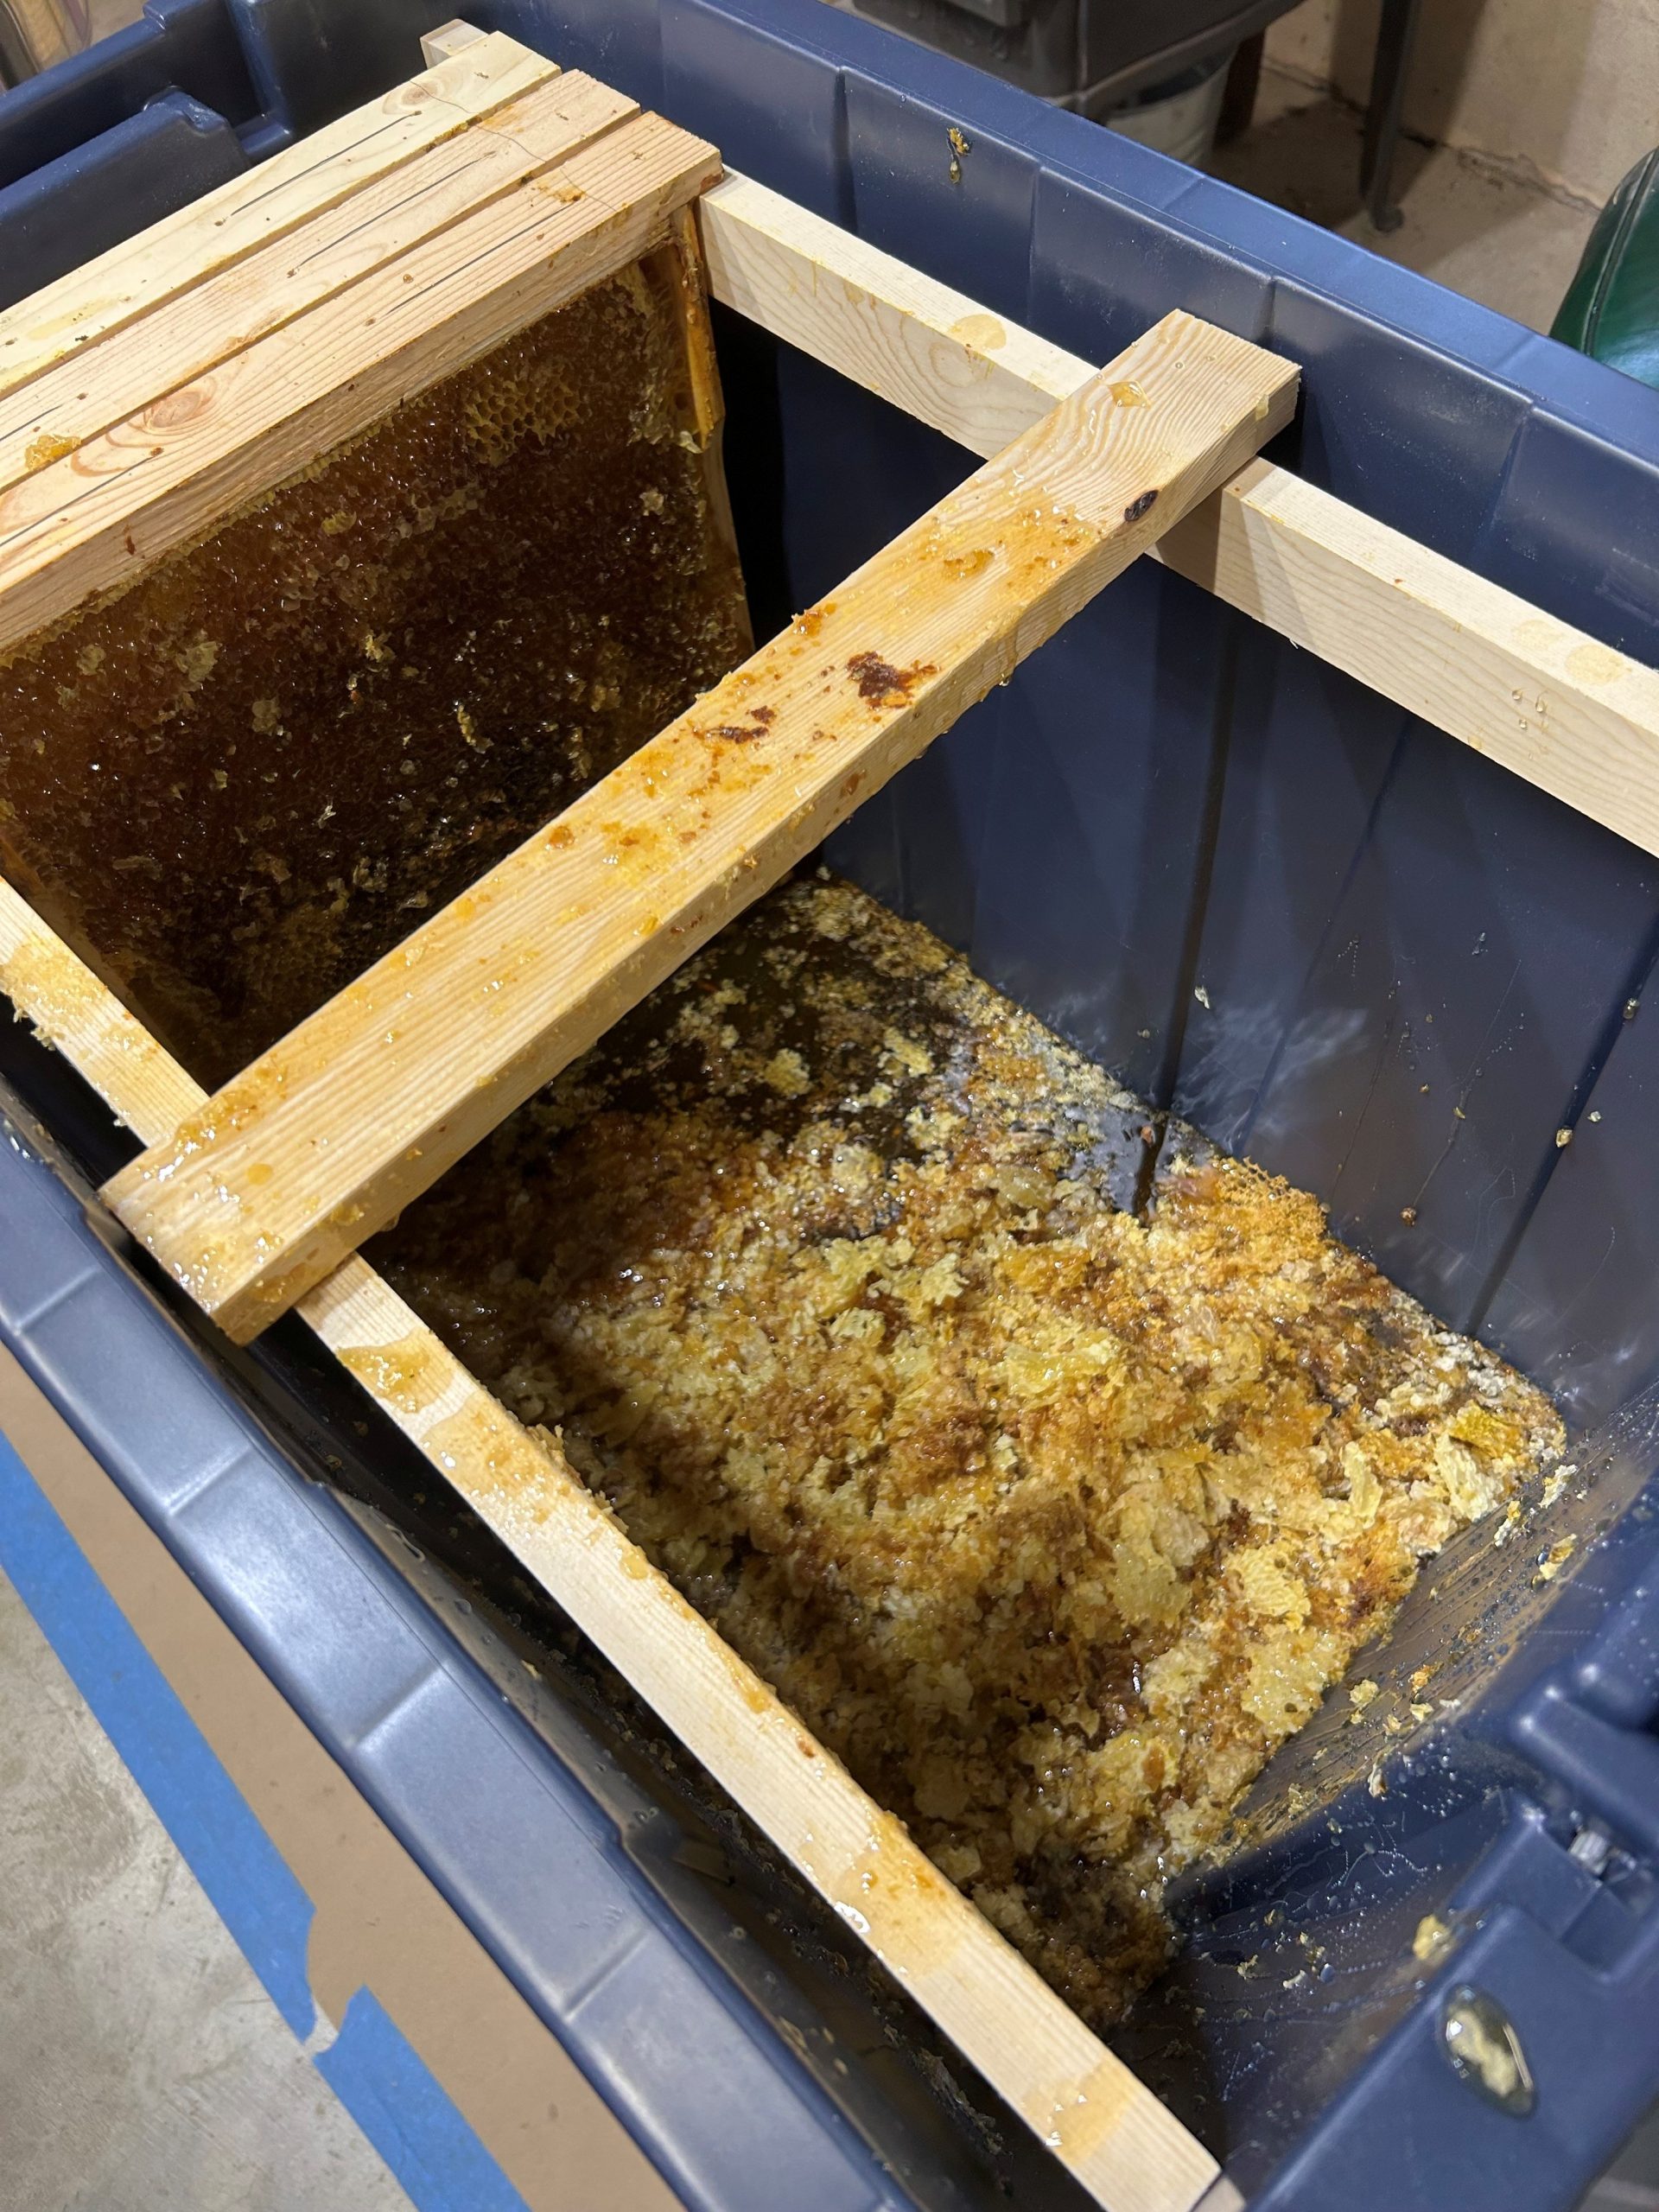
Now that you have your tool of choice in one hand and a frame in the other we can move forward. Yes, Layens honey frames can be heavy. Full Layens frames could be upwards of 10pds. So, you will want to balance these on something while you’re working, and you certainly want something underneath to catch all the sticky capping. We use plastic storage tubs to hold our frames before, during, and after extraction. They are cheap, have a nice lid to seal the frames against pests, easy to carry, and easy to clean. We simply place a bar across the center of our empty tub that is just wide enough to comfortably rest the frame on while uncapping. This allows you to hold the top of the frame, uncap, and let the capping fall into the tub along with any dripping honey. Yes, you can really make a mess of whatever space you are using so work to keep things as clean and sticky free as possible. At the end of the process, you can scrape the tub clean and wash it out.
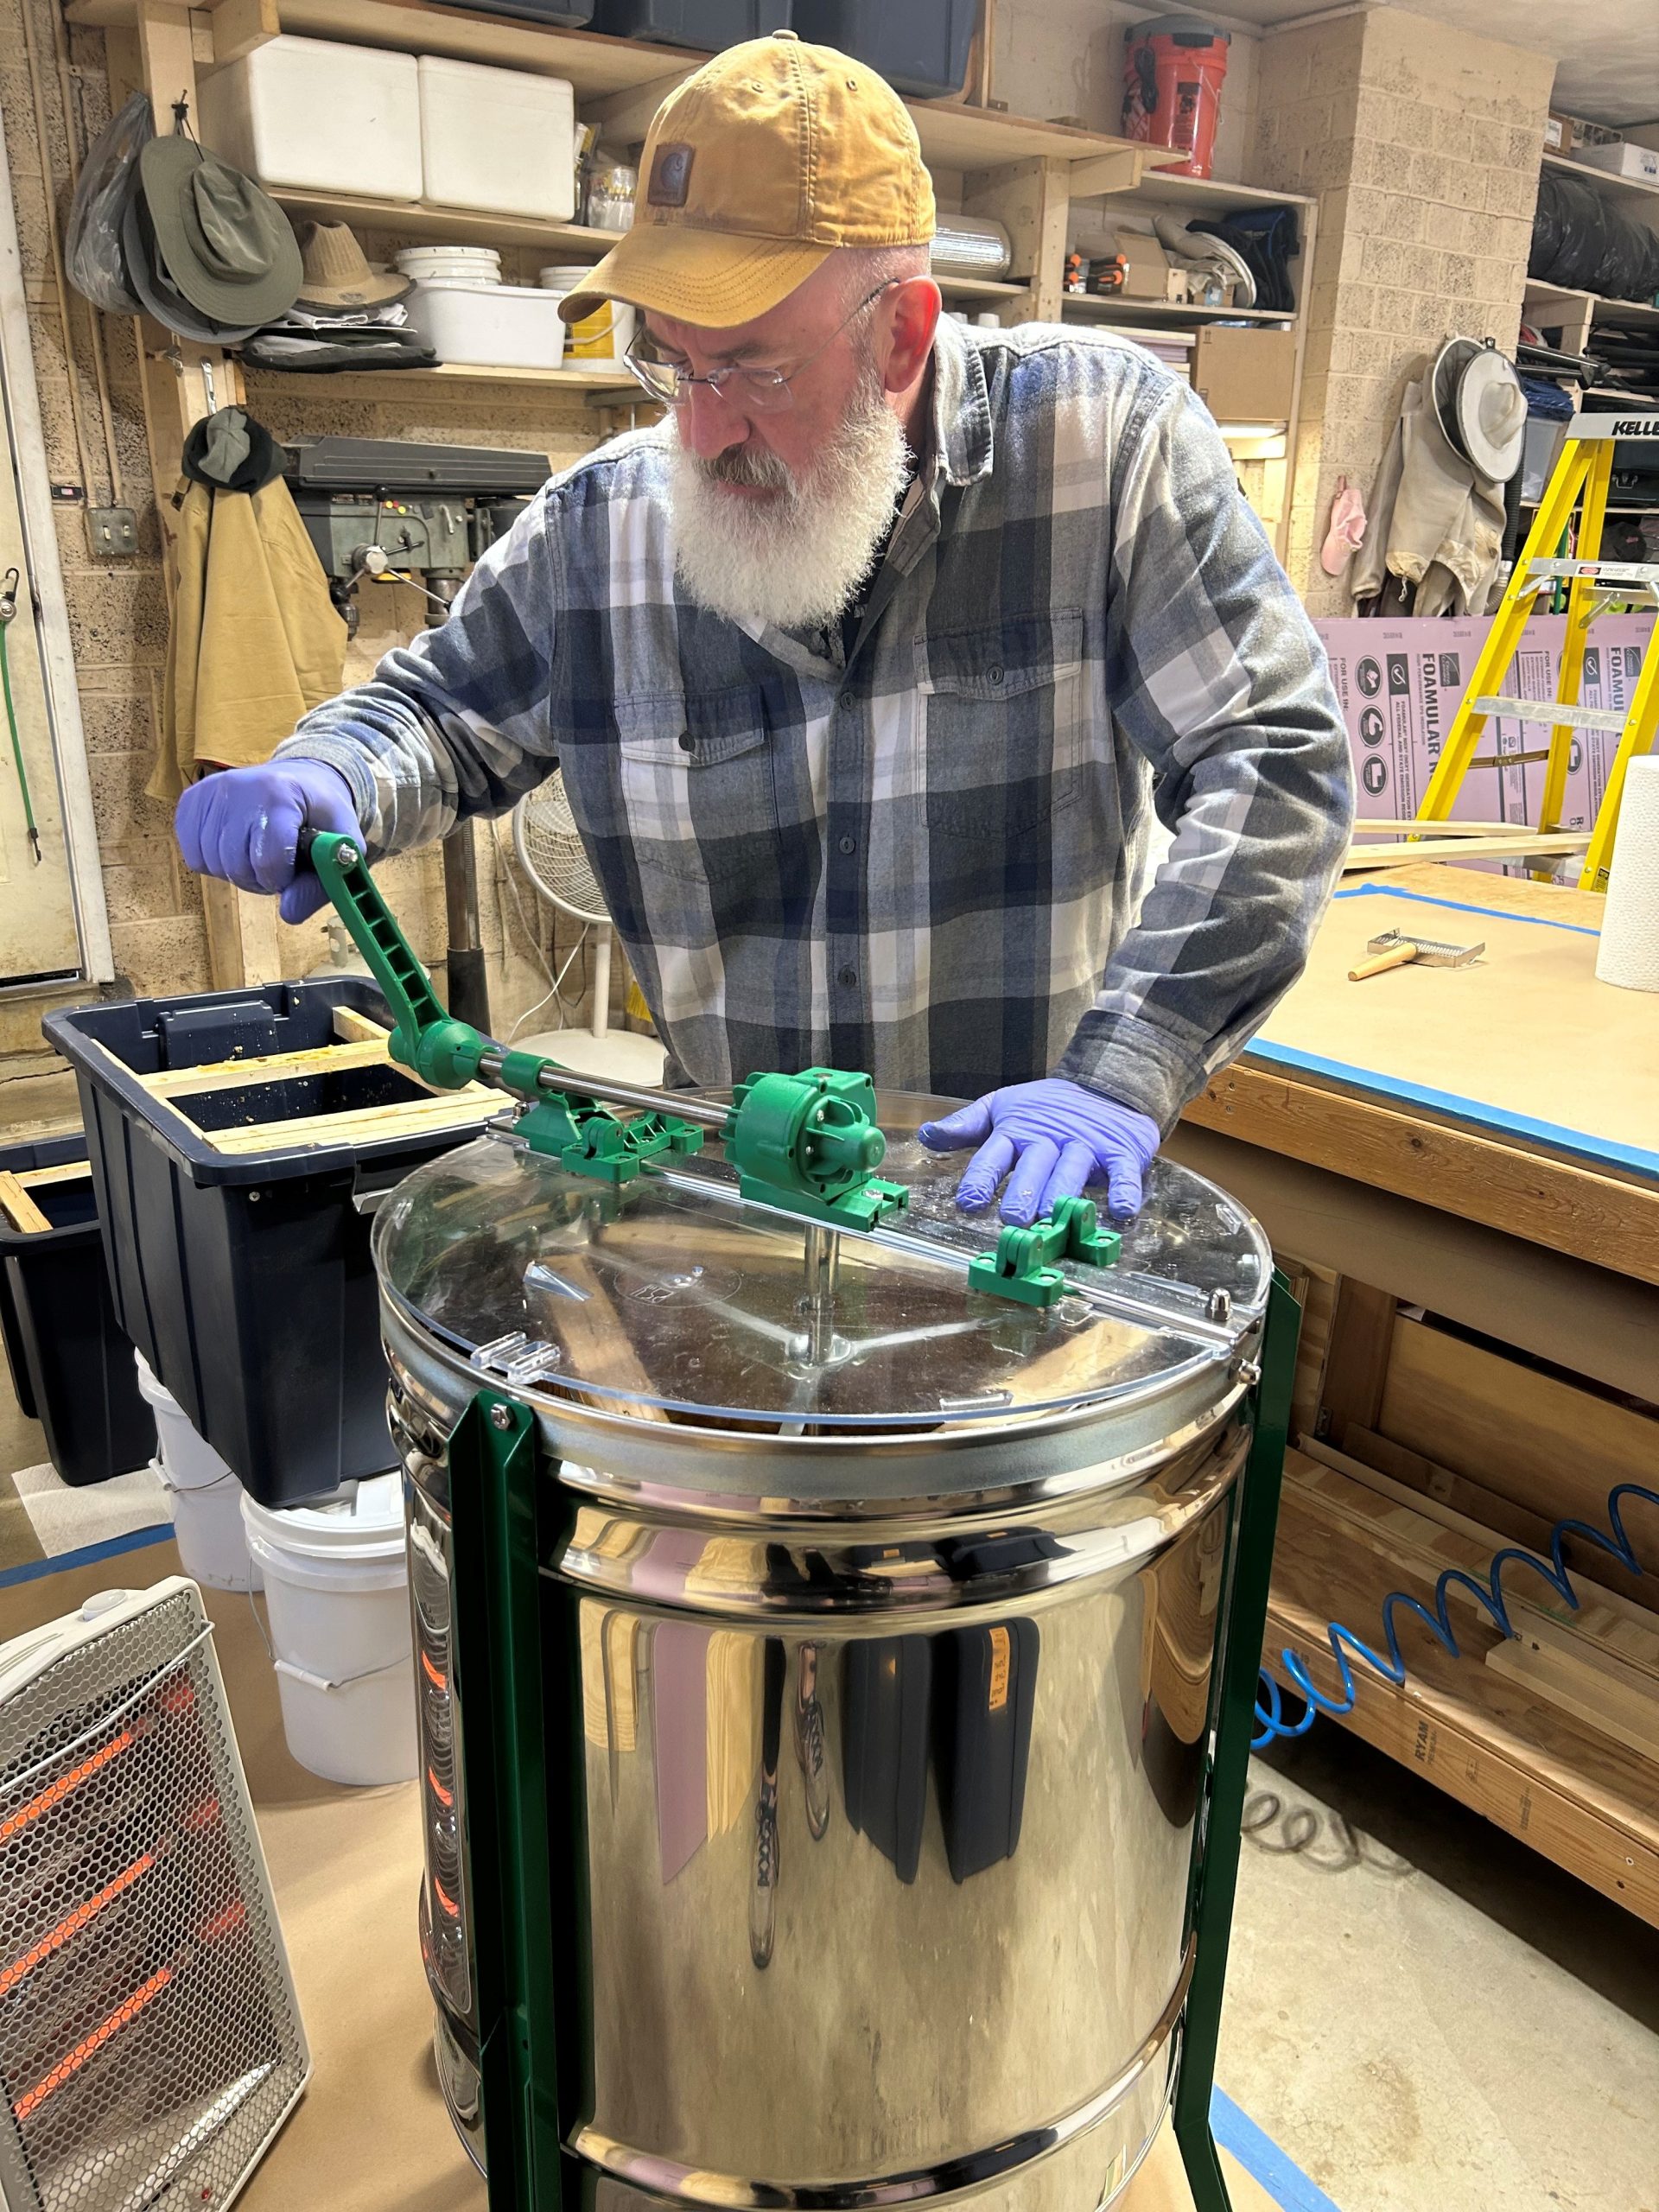
Crush Method or Extractor
So now you have a frame of uncapped dripping honey in your hand. How are you planning to extract the honey from the comb? Again, this is another beekeeper’s choice. If you are a new beekeeper with only a couple of frames from one or two of your first hives you may decide to use the crush method. It’s simple and exactly what it sounds like. You remove the comb from the frame and crush it into a strainer allowing the honey to drip through into a bowl or bucket. All you might need is a spaghetti strainer and a potato masher. The problem with this method is you have now destroyed one of your most valuable resources, comb. An extra frame of comb is so useful to a beekeeper that they are like gold so I would suggest moving to an extractor as soon as you can and save the comb.
Layens frames are larger than Langstroth so you or a really good friend will need to have purchased an appropriate extractor. These are larger in size so turning to a Langstroth beekeeper or local club won’t work. They are also expensive. As expected, a hand crank version is your cheapest version with motorized versions costing almost double. On second thought, maybe a couple of good friends going in to purchase one is your best idea.
One thing to keep in mind with any extractor is to start slowly and spin-out some of the honey on each side before increasing the speed. This will help keep the comb from “blowing out” because of the centrifugal force and the weight of the full comb. This gets us back to the idea that we want our capped honey to be in old comb. Old comb because of the multiple generations of cocoons spun by the larvae will become darker in color, more rigid, and harder. This will allow the beekeeper to have an easier time extracting honey and reduce overall time spent since you can spin the frames faster.
When you’re done spinning out each frame what do we do with them. We put them back into our storage tub for safe keeping until our next visit to the hive when we can add them back in to hopefully be filled again before the end of the nectar flow.
Honey Buckets
5-gallon food grade buckets with a snap-on or Gamma Seal screw on lid are your best friend. Add a honey gate and you will use these buckets for everything from transferring honey from the extractor, letting the honey settle to get the air bubbles out before bottling, dispensing honey into bottles, or even for long-term storage. They are well worth the money and easy to make if you want to save a few bucks. We always have 6 or more sitting around.
Since you are often instructed not to let the honey level rise inside the extractor above fittings that secure the spinning shaft to the bottom, we leave our gate open on the extractor so it spills into a waiting 5-gallon bucket as soon as it can. The reason for limiting the level of the honey is so that it doesn’t come into contact with any fittings and possibly grease which would contaminate the honey.
Filtering
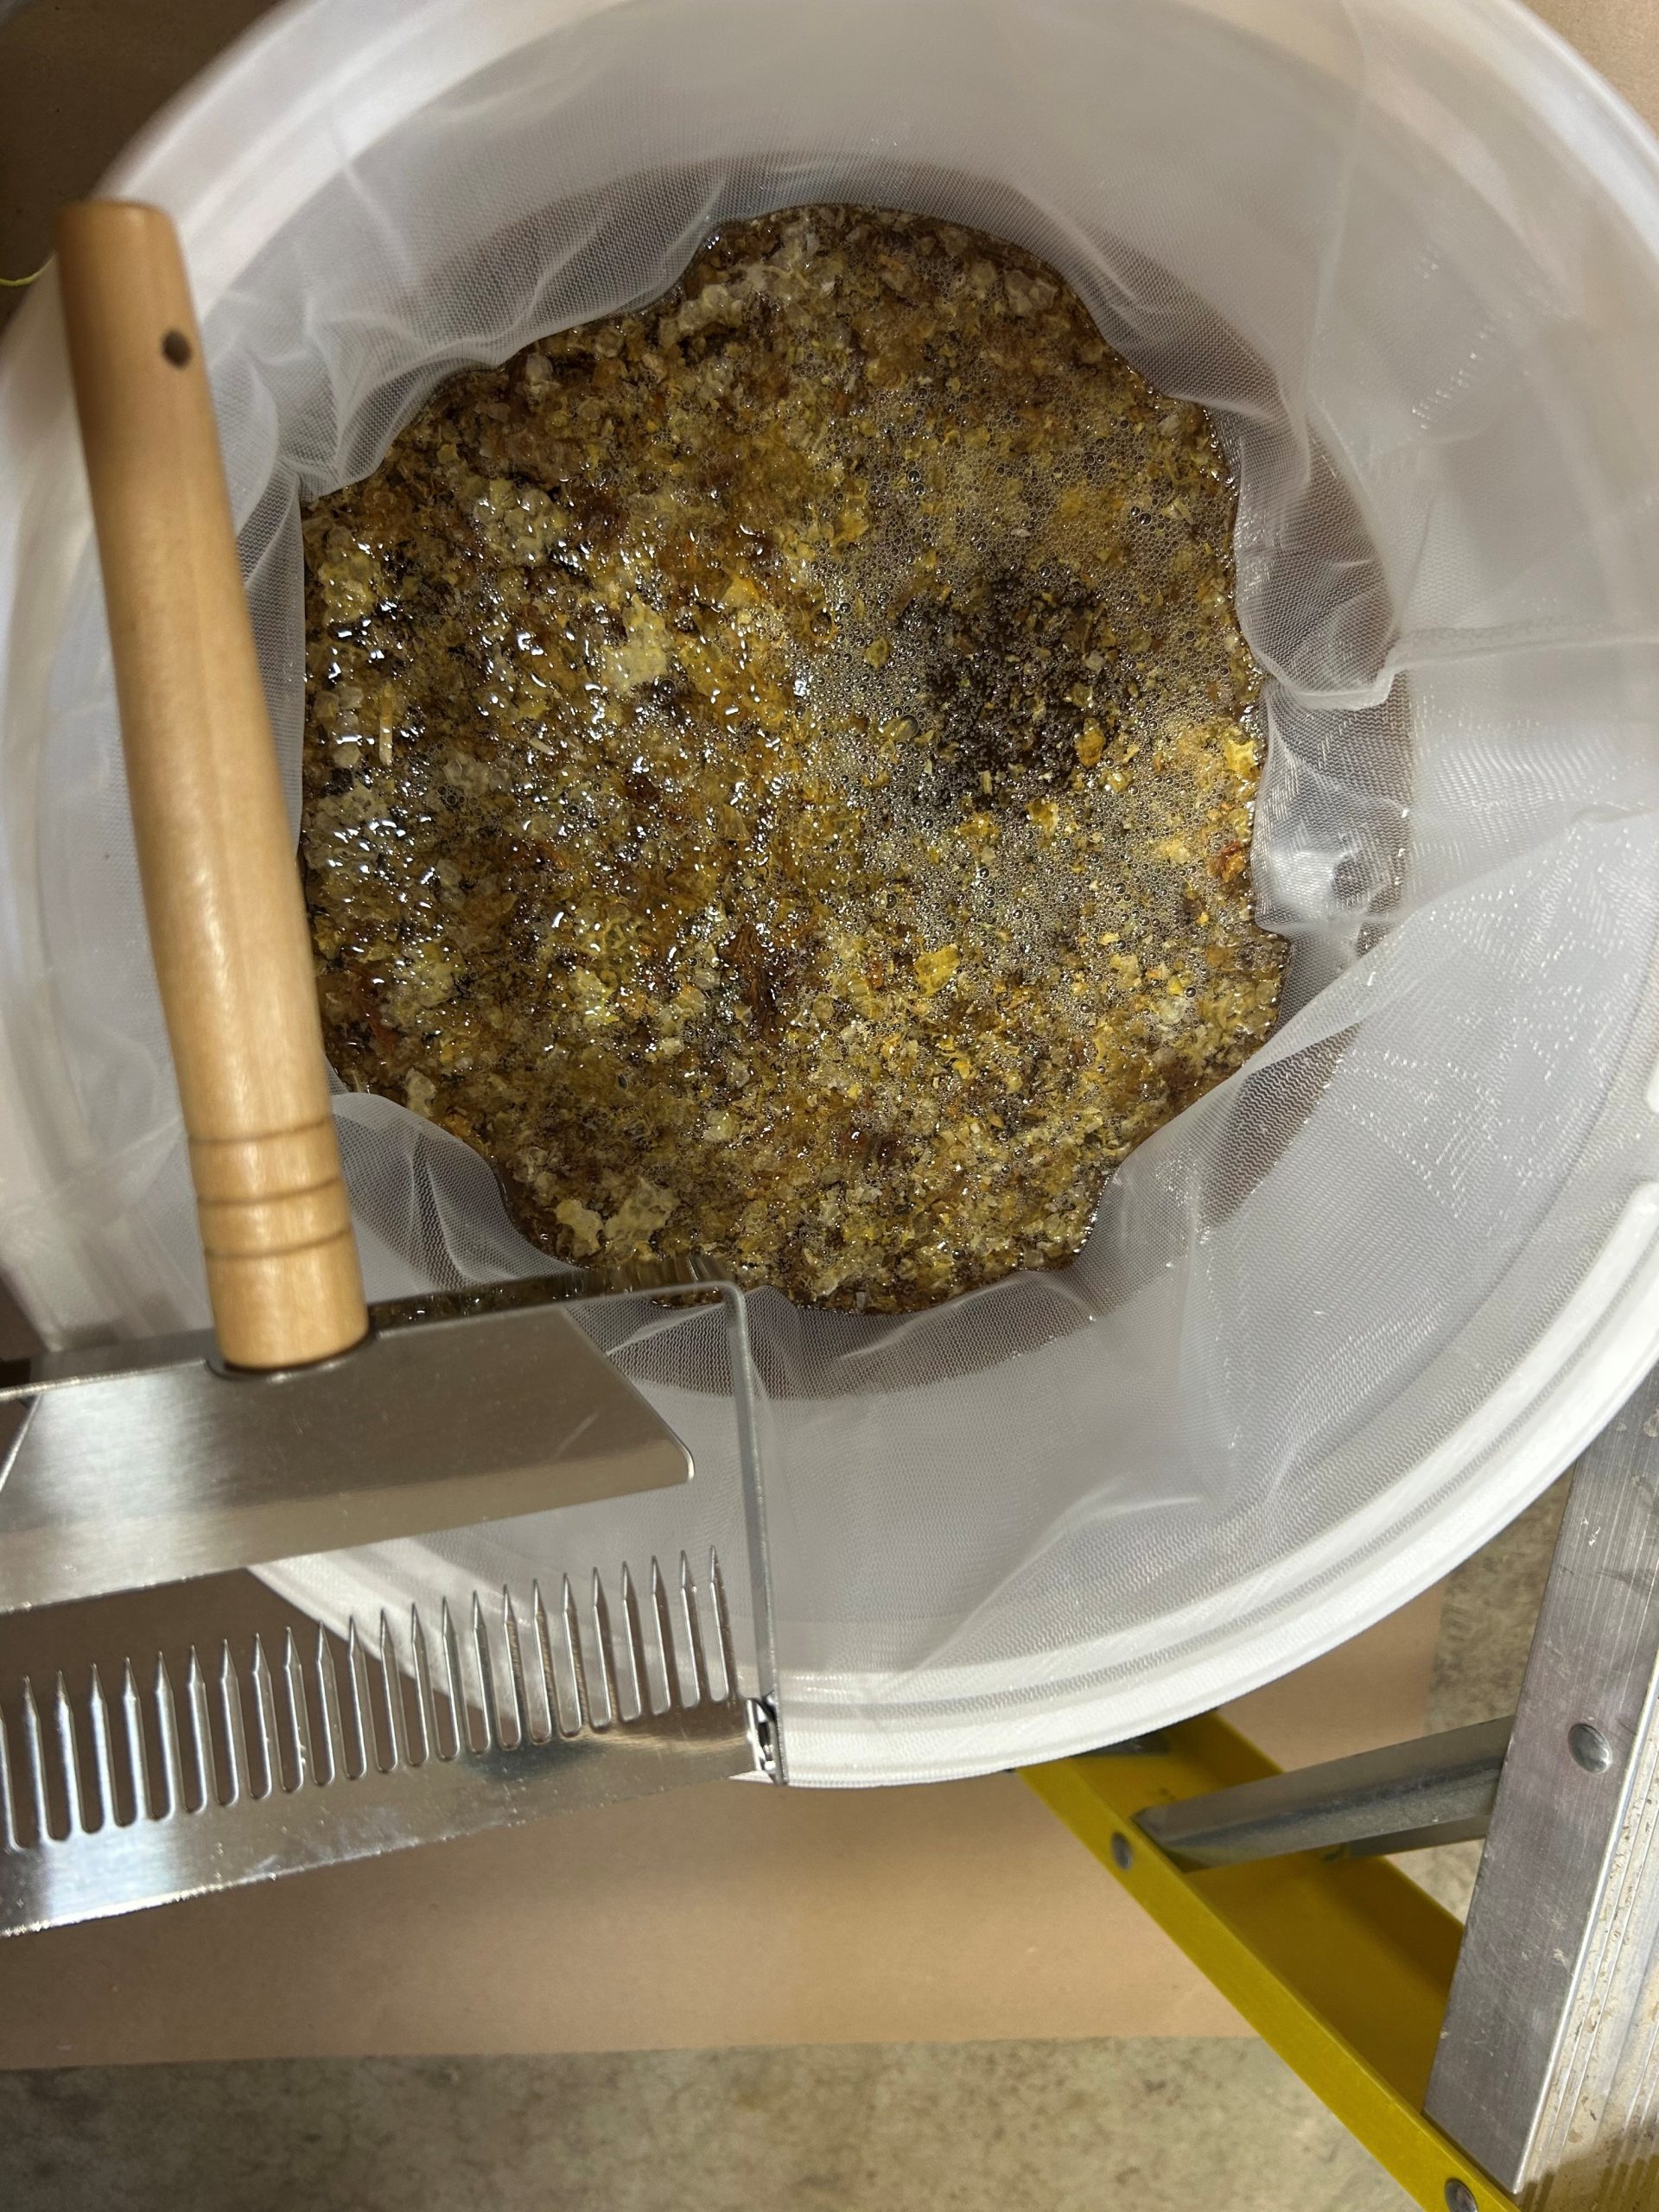
At Wild Hives we sell raw honey which has been filtered just enough to remove capping, bee bits, pests and any other debris that often gets stuck to frames and comb during the time between the hive and the extractor. Some beekeeper might suggest a stainless-steel double strainer which also has a built-in bracket allowing it to sit on top of the 5-gallon bucket, but we have found these to be extremely difficult to process multiple frames without the need to constantly clean the strainer causing additional sticky clean up issues as you might expect.
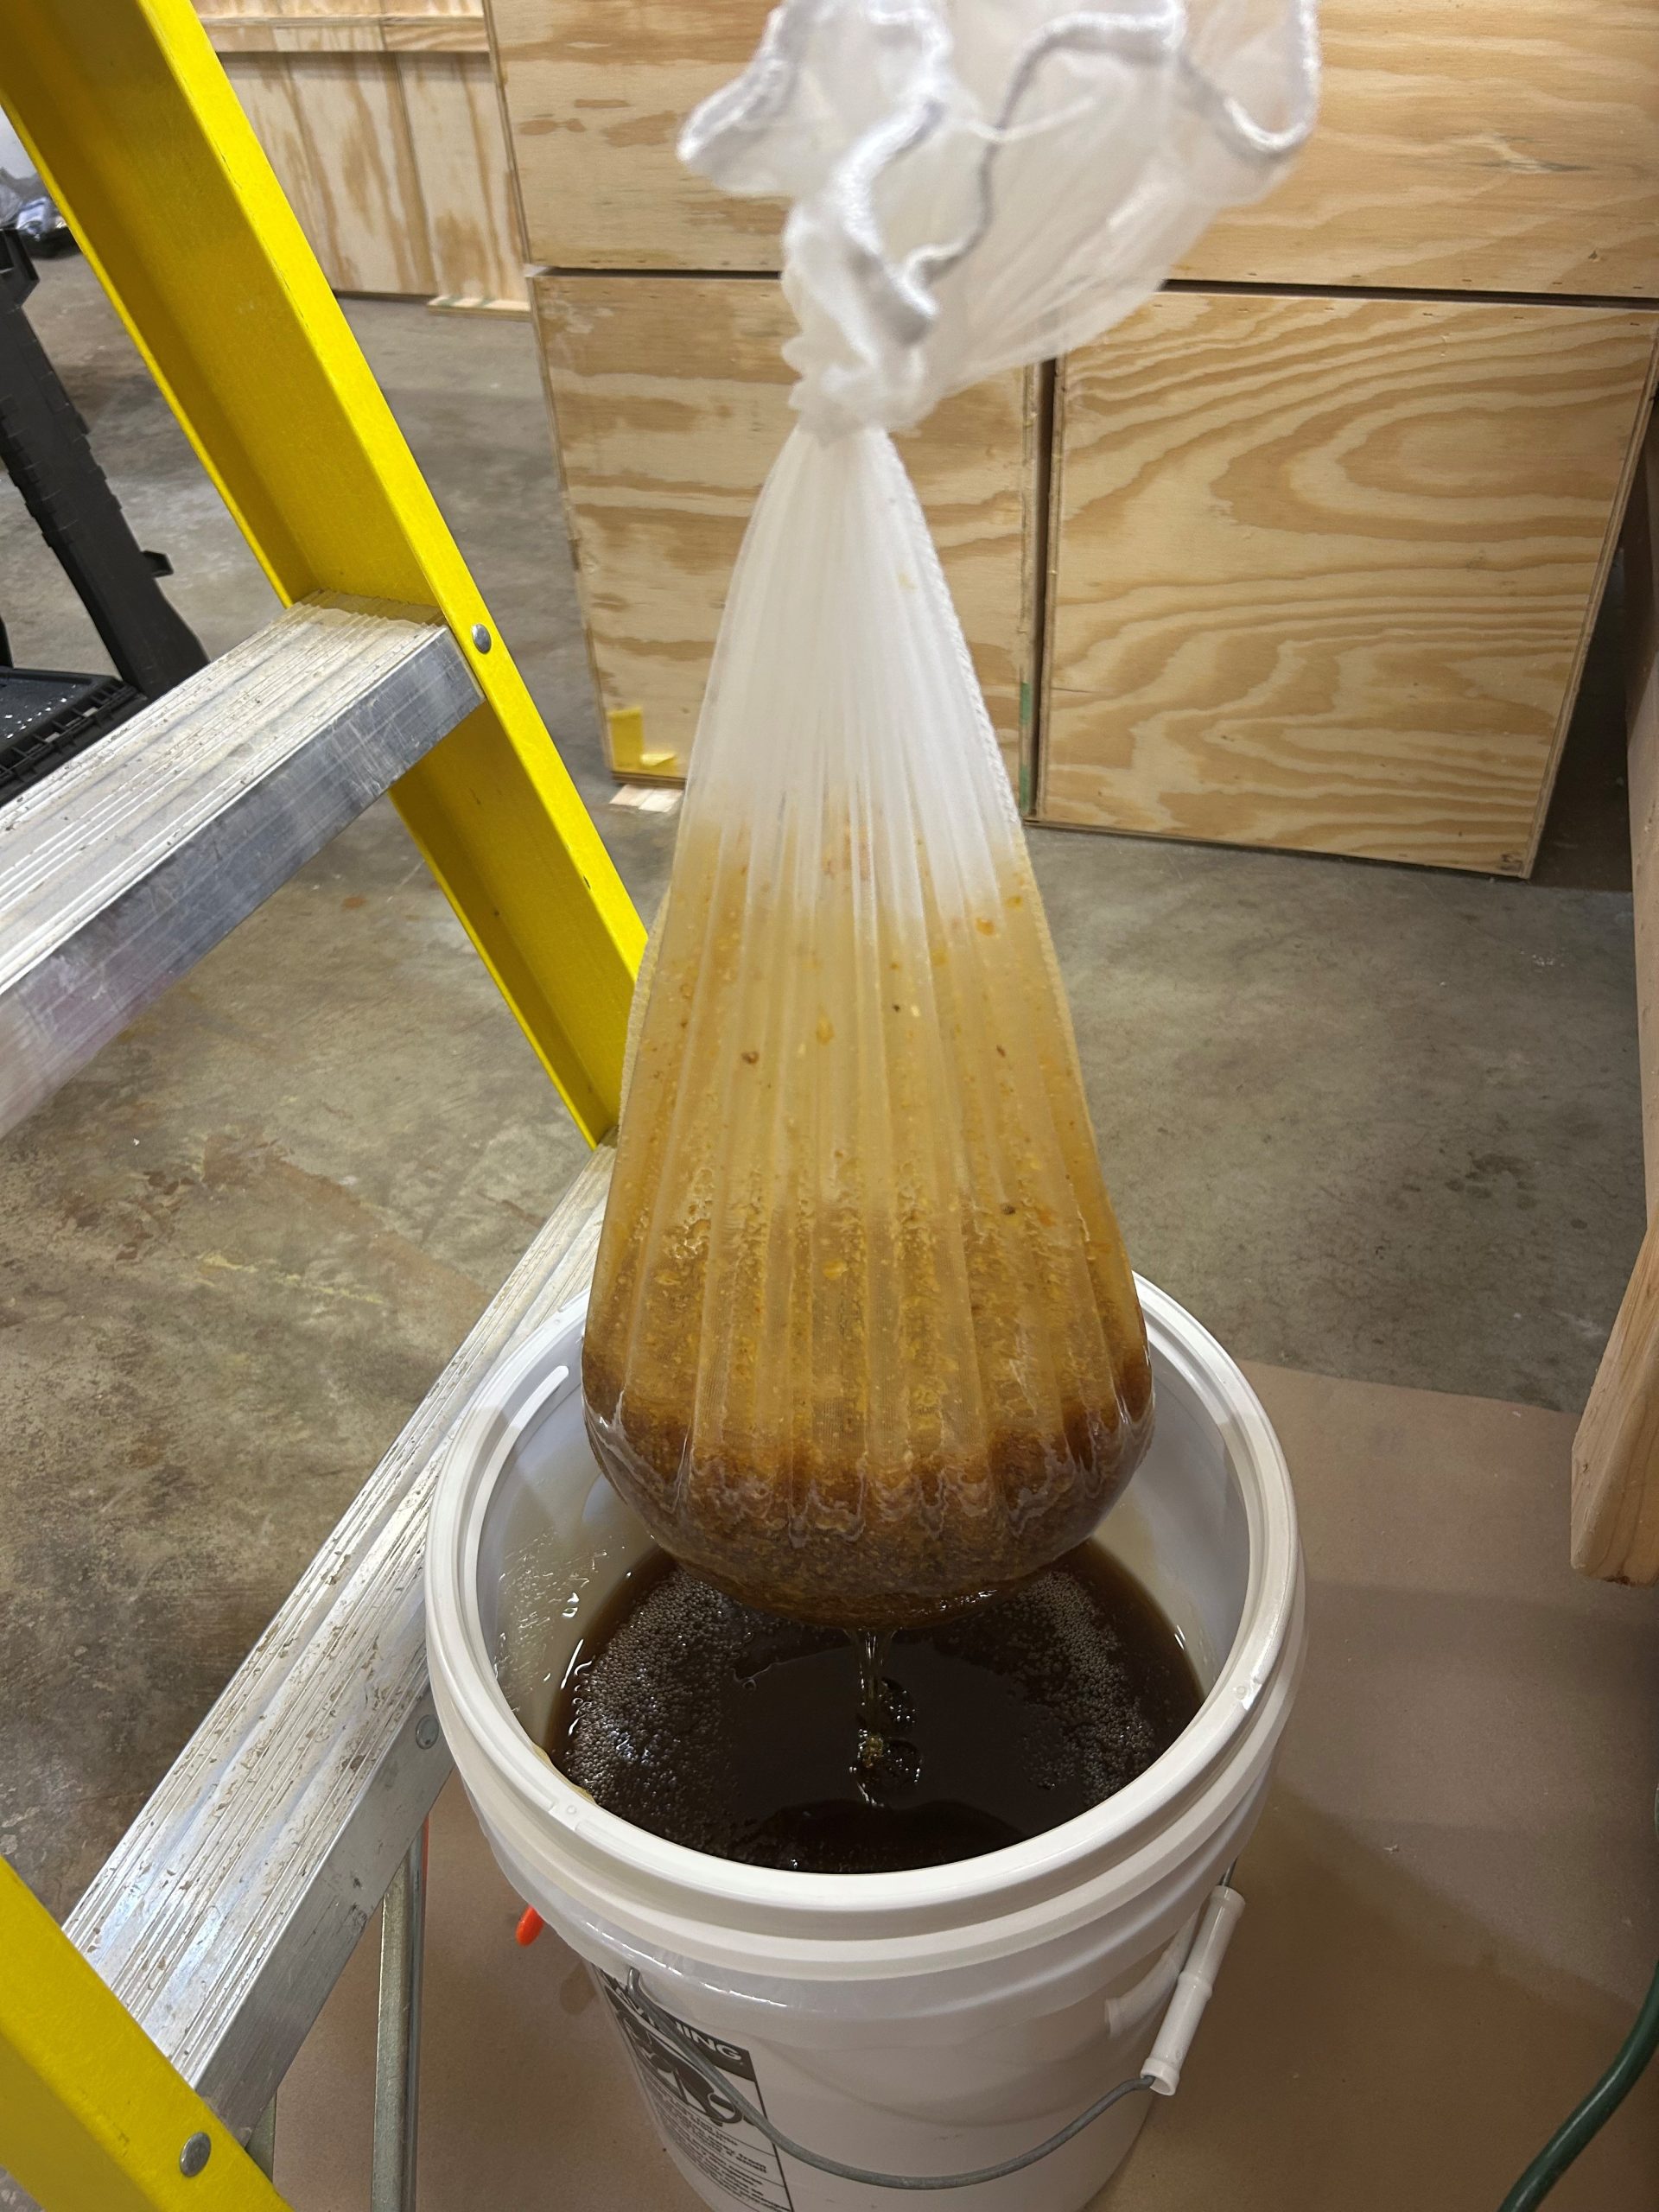
Since we don’t intend to filter out any pollen granules and want to leave the honey in as raw a state as possible, we prefer using a mesh nylon bag that fits down inside the bucket while the honey and capping are entering the top from the extractor. Once the bucket is full, we close the extractor gate and raise the bag above the honey in the bucket to strain for a few hours until all the honey goodness is in the bucket and everything else has been caught in the bag. We then put the bag of capping into another bucket to melt down at some point in the future.
Testing
Yes, you should test your honey for moisture content. Interpreting the results of honey moisture content testing is essential to understanding the quality and suitability of the honey for various purposes. The moisture content is typically expressed as a percentage, representing the amount of water present in the honey.
- A moisture content of around 17-18% is generally considered ideal for honey. This range provides a balance between preventing fermentation and maintaining the honey’s overall quality.
- High moisture content, above 20%, indicates that the honey is at a higher risk of fermentation. Fermentation can result in the production of alcohol and off-flavors, making the honey unsuitable for consumption or commercial use.
- Low moisture content, below 16%, may lead to crystallization and a longer shelf life. However, extremely low moisture content can also result in a loss of nutritional value and affect the honey’s texture and taste.
It is important to note that the ideal moisture content can vary depending on the type of honey and its intended use. Some honeys naturally have higher moisture content due to their floral sources, while others have lower moisture content. Beekeepers should be aware of the desired moisture range for their specific honey variety to ensure its optimal quality.
Storage and Settling
If you haven’t extracted honey before you will find that as it is extracted, you introduce air into the honey that can be seen as bubbles or foam on the surface. It’s suggested, for good reasons, to let your honey settle over a week or longer to let these bubbles rise to the top before bottling. If you are using a 5-gallon bucket you will see this on the surface when you remove the lid.
If after some time you still have foam or some particles on the surface, you can use a piece of clear Saran Cling Wrap to easily remove it. Just pull a piece off the role that will cover the whole surface, lightly pat it onto the surface of the honey, and slowly pull it away. You can always do this more than once if needed. The Saran will be covered in honey and the foam so have something to throw it into before it drips everywhere. We suggest removing the foam before bottling so you don’t introduce this into the bottles for sale. There is nothing wrong with the foam, but your honey in the bottles will look better without it.
As mentioned above you can also store your honey in a 5-gallon bucket in a cool place as long as you have a secure and sealed lid.
Bottling
There are all kinds of thoughts about what bottles to use for honey. For those selling their honey the venue and customer expectations are important to know. Local farmers’ markets are a great place to get some ideas of what customers expect. You might also consider trying a few styles of bottles to see what sells the best before jumping into a large order of supplies.
Bottling is simple if you have a 5-gallon bucket with a honey gate. No need for special equipment. A good eye and steady hand are all it takes. Think ahead and assure you have wet paper towels or other items to keep things clean and honey free. There’s nothing worse than getting drips here and there making everything you touch sticky. Clean up as you go is the best idea.
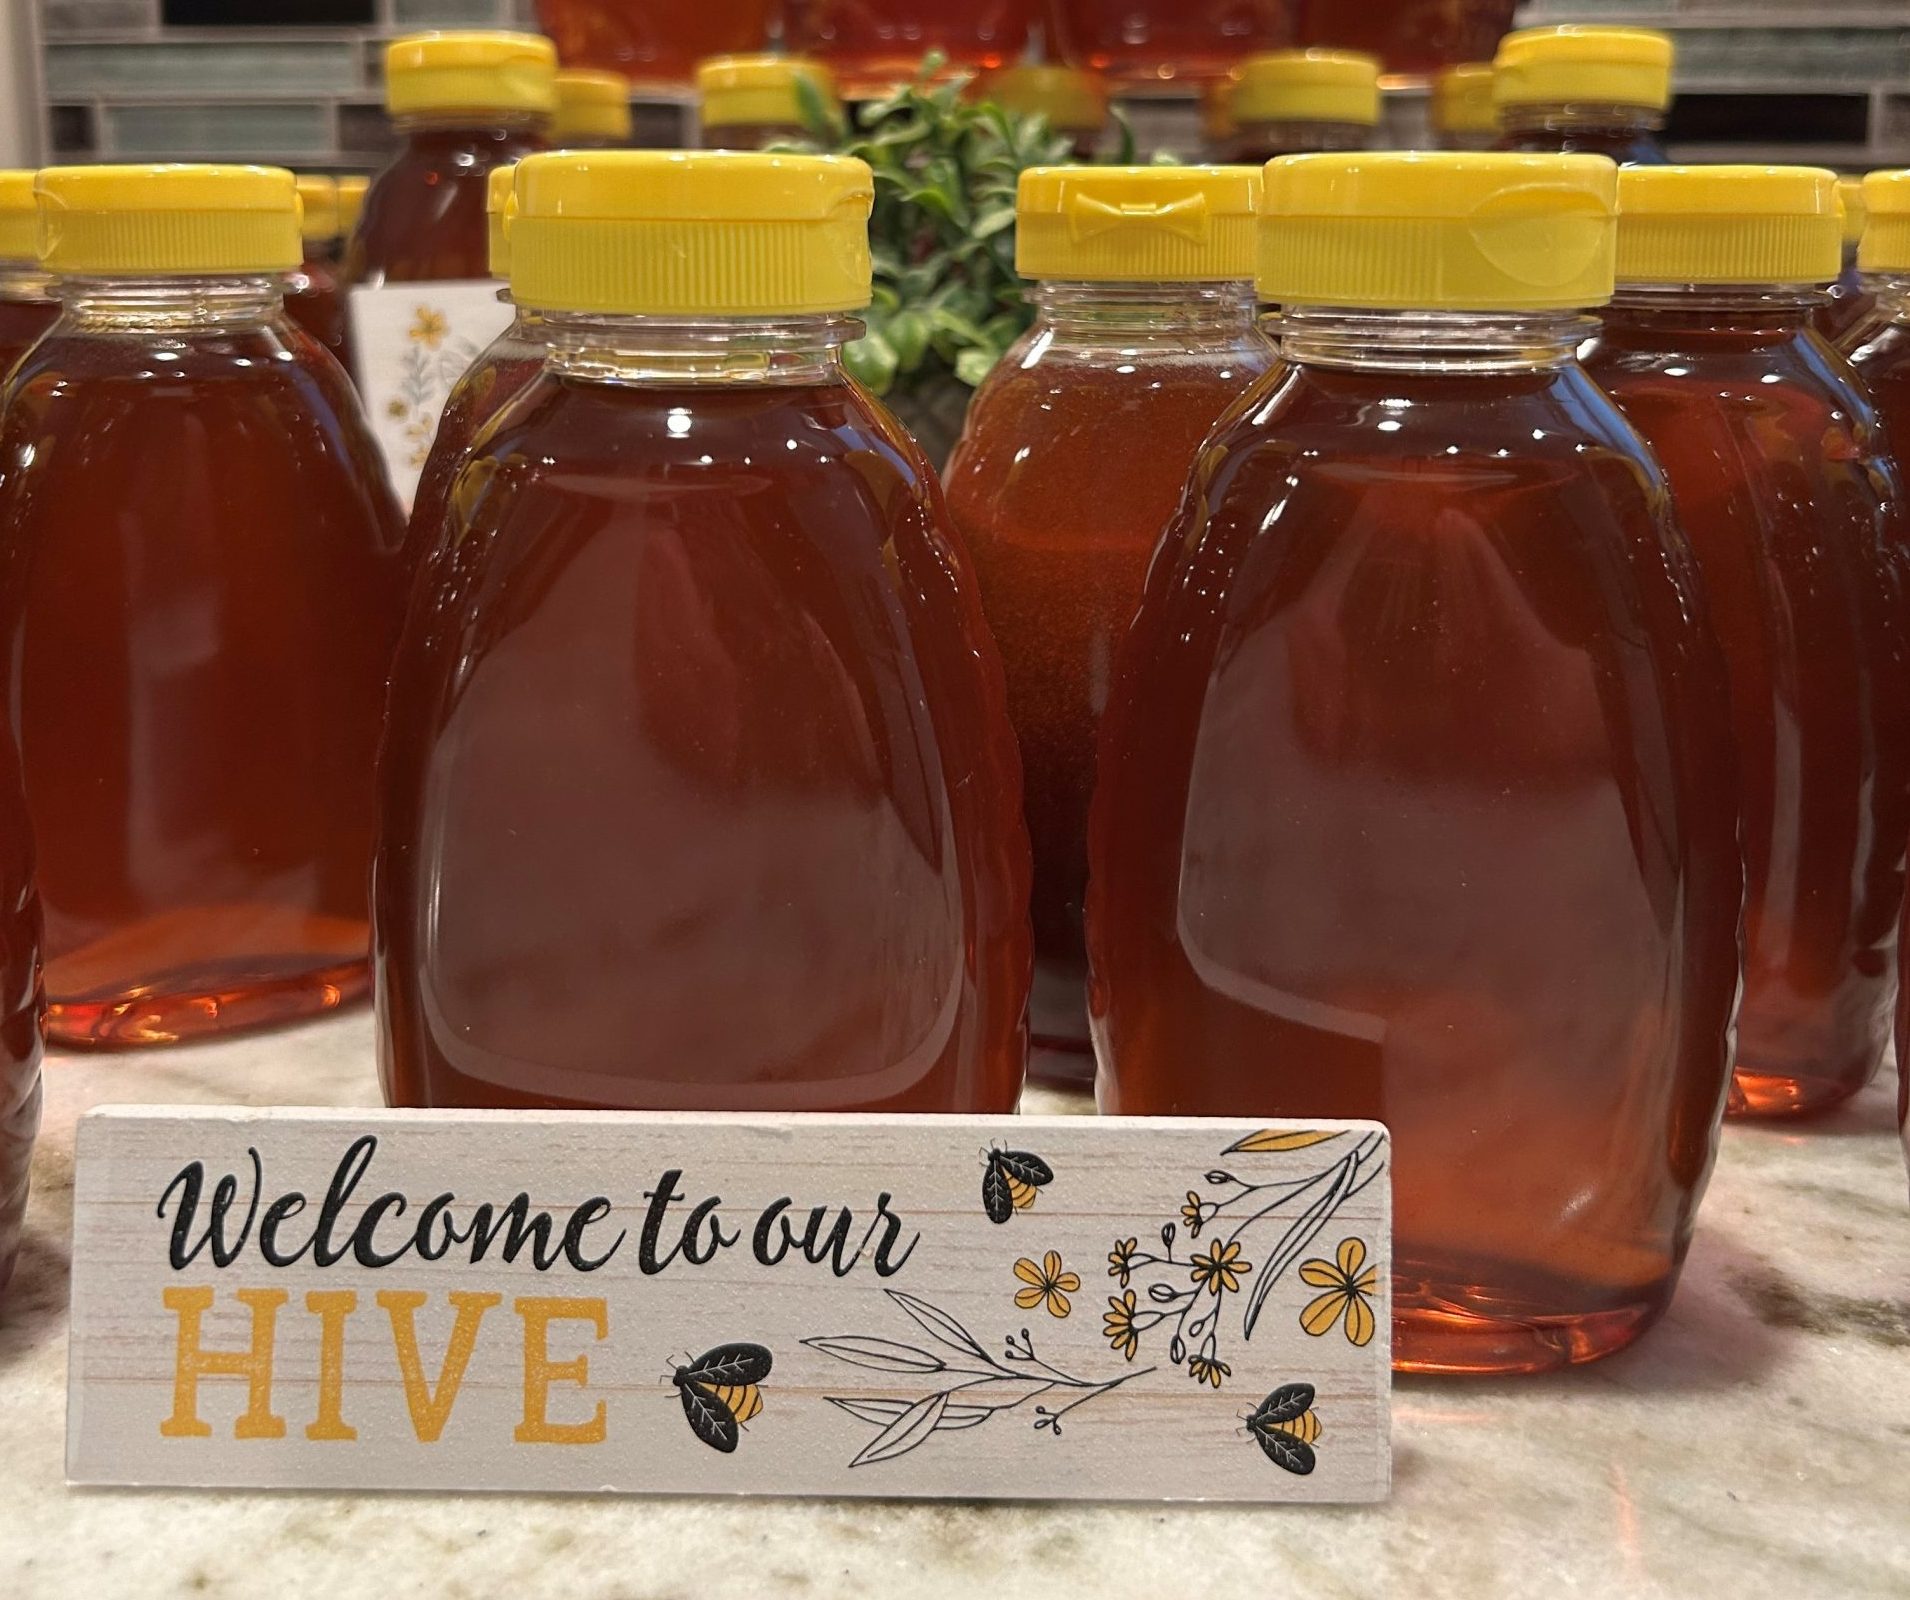
We use a simple and convenient clear plastic 16oz (1 pint, 1 pound) squeeze bottle with a sealed screw on top. Most people go through their honey quickly especially if priced reasonably which has the added benefit of increasing repeat business. The quick consumption can also reduce concerns of storing honey long-term in plastic bottles since the storage time will be short. If you decide to hand out samples, consider some cute 2oz plastic Honey Bear bottles. Also, don’t forget gifting a bottle or two to your neighbors. It really helps when they find your spring swarm in the eve of their house.
Laws and Regulations
I won’t get into laws and regulations in your area. This is a topic for you to research and if you are in Ohio hopefully the links below will be helpful. Remember that like any other livestock you are responsible for abiding by state laws in caring for and selling any resulting products. Honey is a food product and is expected to abide by your state food safety regulations. Also know that laws can often change so checking each year that you are in compliance helps you and other beekeepers in your area.
https://agri.ohio.gov/divisions/food-safety/resources/honey
https://allthingshoneyandmore.com/ohio-honey-sales-techniques.html
https://clients.ohiosbdc.ohio.gov/DocumentMaster.aspx?doc=2482
https://agri.ohio.gov/divisions/plant-health/apiary-program/management
https://agri.ohio.gov/divisions/plant-health/apiary-program/registration